Turn your Home into a Smart Home with Azure IoT – Part 2
June 4, 2017 Leave a comment
Deploy the Bridge and Connect to the Cloud
In this post, I’ll be blogging about deploying the custom application in your home environment and setting it up with an Azure IoT hub to send the telemetry data. The following diagram shows the components.
First let’s create the Azure IoT hub required for the solution. This post assumes that you have an active Azure Subscription.
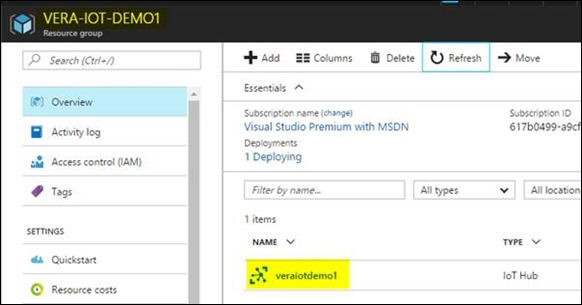
First of all, you will need to create a Resource Group to contain all the resources you create for this solution. I will call this Resource Group as “VERA-IOT-DEMO1”
Then you create the IoT Hub, you can choose the free version of the IoT Hub.
Once the IoT hub is created, add a device to the IoT hub.
Once the device is successfully provisioned, click on the device to get the access keys and the connection strings.
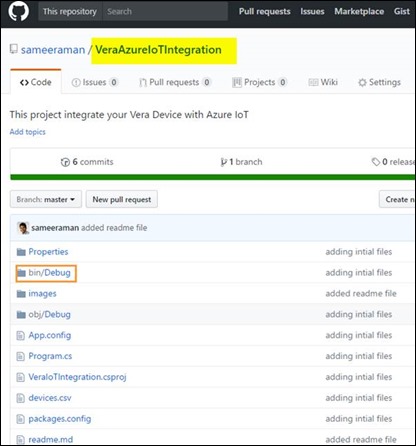
Now let’s go and download the custom application to integrate Vera and the IoT Hub created. The source code and the binaries for the custom application can be found in the following repository.
https://github.com/sameeraman/VeraAzureIoTIntegration
If you don’t want to modify the code, then you can use the existing pre-compiled version of the application. It can be found under the /bin/debug folder.
Before you run the application, you need prepare some files.
-
The application configuration file (consists of some parameters such as the IoT hub details)
-
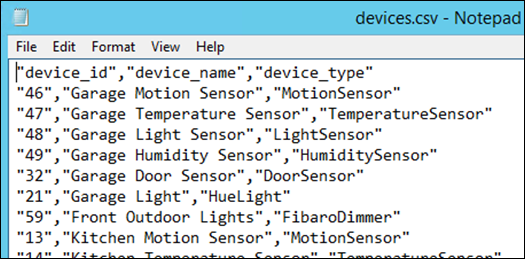
The devices.csv file (this files lists the definition of the devices you have connected to Vera)
First, let’s go and modify the application configuration file.
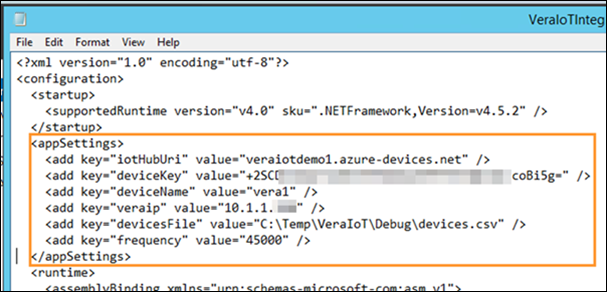
Open up the /bin/Debug/VeraIoTIntegration.exe.config
Then modify the following parameters.
Enter the IoTHubUri from the IoT hub you just created. Also the Device Name and the Devicekey. The VeraIP should the local IP address of the Vera controller. DevicesFile is a CSV file which defines the list of devices to read information from. Frequency defines the frequency to send IoT messages to the hub in milliseconds. After populating these information open the devices.csv file.
An Example file can be found in the repository. It looks as below, populate it with the devices you have in your environment.
Once your devices file is done, you are ready to run the application. Double click on the VeraIoTIntegration.exe. Then if everything works well, you will see something like below.
After a few minutes, you will see the message count going up as well in the IoT hub.
Now you have successfully configured the Vera integration to IoT hub. In the next post we will be looking at how you configure the Stream Analytics and PowerBI integration.


